
Blender MCP AI
Control Blender with AI through the Model Context Protocol
Quick Start • Architecture • API Reference • Contributing • Discussions • 中文
[!IMPORTANT]This project is not affiliated with any other Blender MCP project.It is an independent, original codebase — not a fork of, and sharing no codewith, anything else. In particular it is unrelated to
ahujasid/mcp-for-blender(formerly published on PyPI asblender-mcp). Theblender-mcppackage onPyPI belongs to that project: installing it does not install thissoftware. Install this project by cloning this repository — seeQuick Start.
Provenance: The overall shape — an MCP server talking to a Blender addonover a local socket — is the standard approach for this category of tool andis shared by other Blender MCP projects, so the architectures look similar.This repository is not a fork, and the implementation here is independent.
Overview
Blender MCP AI is an open-source Model Context Protocol server that lets AI assistants control Blender through natural language. It works with any MCP-compatible client — Cursor, Windsurf, Claude Desktop, and more.
The project consists of two components:
- MCP Server (
src/blender_mcp/) — a FastMCP server exposing Blender operations as MCP tools - Blender Addon (
addon/blender_mcp_addon/) — a Blender plugin that receives commands over TCP and executes them via Blender's Python API
AI Client (Cursor / Windsurf / Claude Desktop)
    ↓  MCP protocol (stdio or HTTP)
Blender MCP Server (Python, FastMCP)
    ↓  TCP JSON messages (localhost:9876)
Blender Addon (runs inside Blender)
    ↓  Blender Python API (bpy)
Blender
Gallery
Generated entirely through natural-language AI commands via Blender MCP AI — no manual Blender interaction.
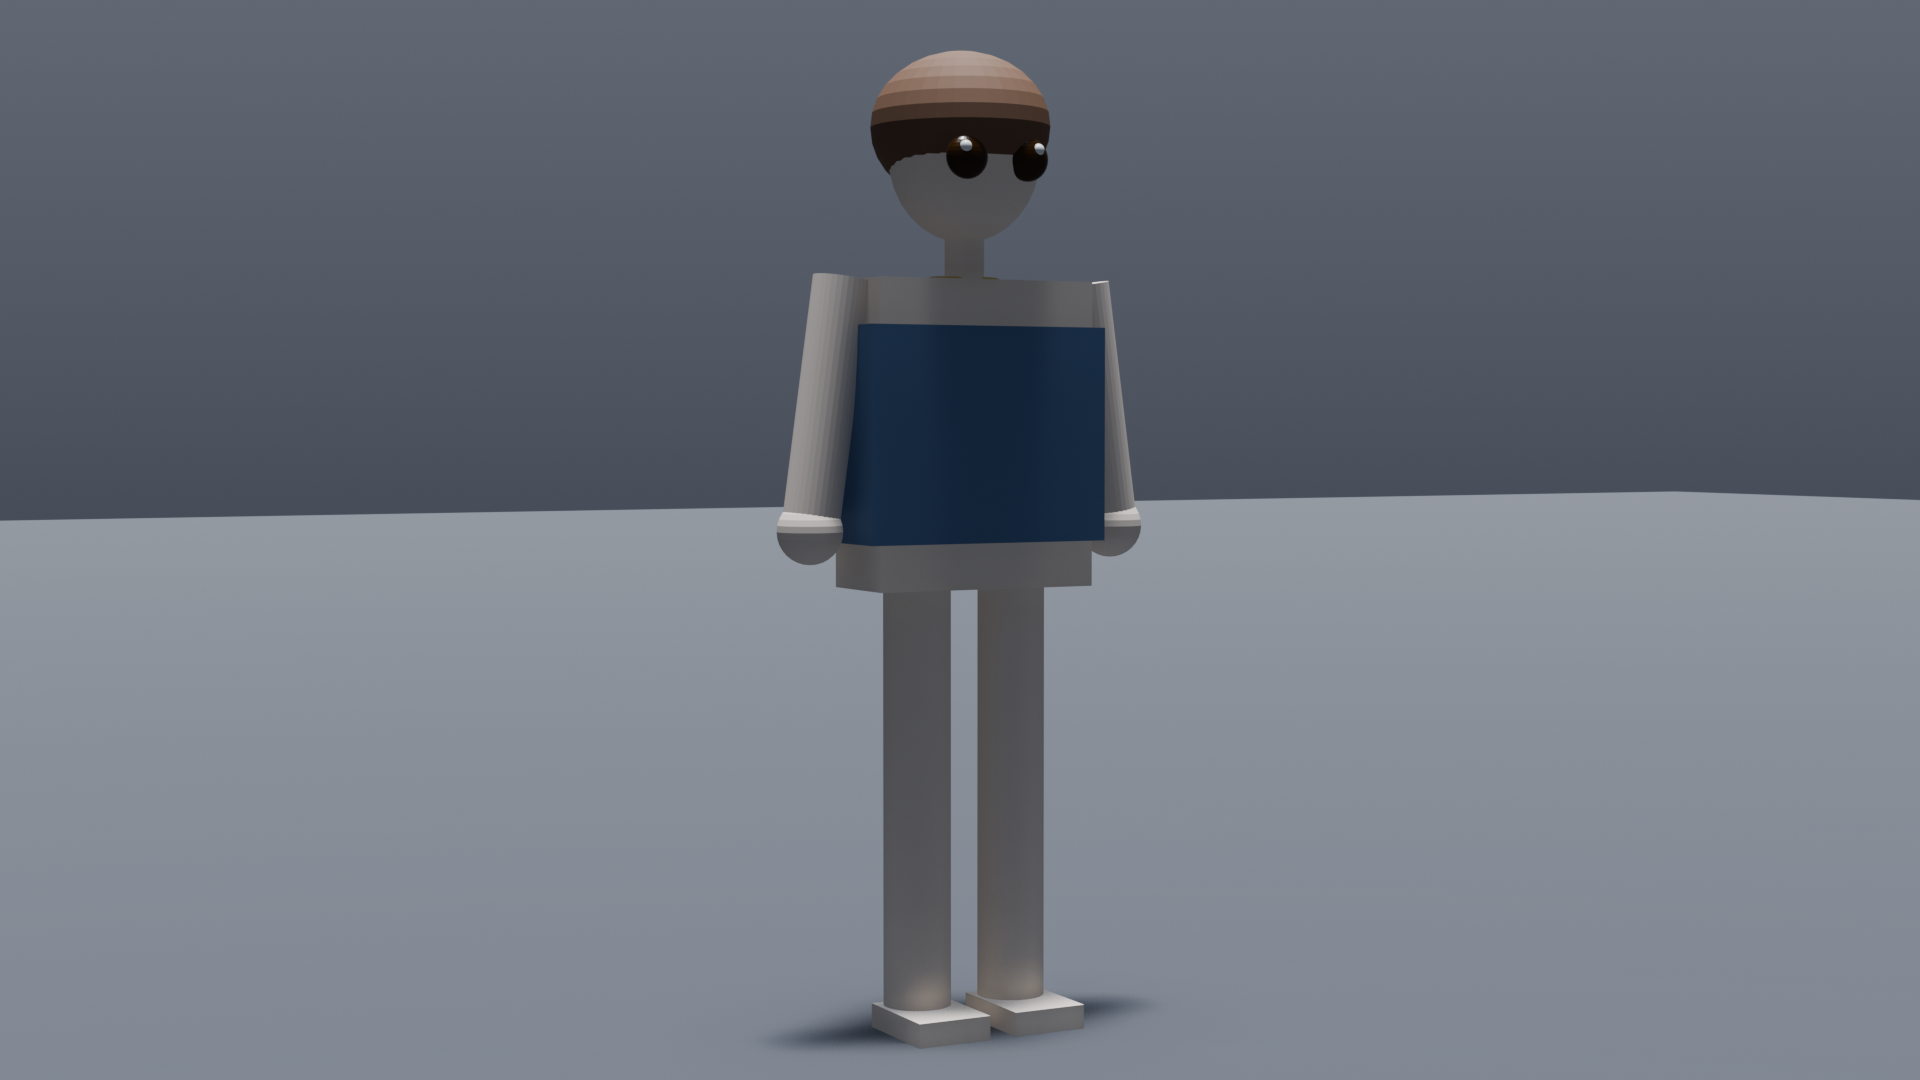
A character built end-to-end by the agent — body template, hair, clothing and accessory — then lit and rendered at 1920×1080 through the MCP tools. It is a deliberately simple primitive-based blockout: the point is the round trip, not the polish.
The point of this project isn't the polish of any single render — it's the agent ↔ Blender pipeline: 380 tools, dynamic skill loading to keep the model's context lean, and viewport/render snapshots that let the model review its own work and iterate.
Key Features
- 380 MCP tools across 56 modules — modeling, materials, animation, rendering, rigging, and more
- Smart skill loading — default
skillprofile starts with 38 tools; 12 skill groups activate on demand to keep AI context lean - 6 profiles — from
minimal(35 tools) tofull(377 tools) - Visual feedback —
blender_snapshot_viewportandblender_snapshot_render_previewfor multimodal AI review loops - Checkpoint system — named save/restore points before risky operations
- Style system — 8 rendering style presets from Pixel Art to AAA
- 67 procedural materials — metals, woods, stones, fabrics, nature, skin, effects, toon
- Quality audit — topology, UV, and performance validation
- Blender 4.x / 5.x compatible
- Multi-IDE support — Cursor, Windsurf, Claude Desktop, and any MCP client
Quick Start
Prerequisites
- Python 3.10+
- Blender 4.0+
- uv
- An MCP-compatible client
Install & Run
There is no PyPI release yet. Install from source —
pip install blender-mcpwould install an unrelated third-party package (see the notice at the top).
git clone https://github.com/harveyxiacn/blender-mcp-ai.git
cd blender-mcp-ai
uv sync

# Build the Blender addon
python build_addon.py

# Start the MCP server
uv run blender-mcp-ai
Set Up Blender
- Open Blender →
Edit→Preferences→Add-ons→Install... - Select
dist/blender_mcp_addon.zip - Enable Blender MCP
- Open the MCP panel in the 3D View sidebar
Configure Your IDE
Add to your MCP client config:
{
  "mcpServers": {
    "blender": {
      "command": "uv",
      "args": ["run", "--directory", "/path/to/blender-mcp-ai", "blender-mcp-ai"]
    }
  }
}
Try It — a guided tour
Want to see what this does before reading anything else? With Blender open andthe addon enabled, build a demo scene and inspect it layer by layer:
uv run python scripts/demo_tour.py --clean
It drives the MCP socket 46 times and groups the result into one collection perlayer, so you can hide everything except the thing you want to look at:
| Collection | What it demonstrates | How to look at it |
|---|---|---|
L1_场景基础 |
Object creation and transforms | Outliner → select L1_Cube → press N |
L2_建模 |
Bevel / Subdivision / Boolean modifiers | Properties → wrench tab, toggle each modifier |
L3_材质 |
Metal vs plastic, Principled BSDF values | Press Z → Material Preview |
L4_灯光相机 |
Three-point lighting and a camera | Press Z → Rendered; select a light to read its power |
L5_UV |
Smart UV project | Open a UV Editor, Tab into edit mode, press A |
L6_动画 |
Keyframed bounce + spin | Timeline → press Space |
L7_角色骨骼 |
Generated character plus an armature | Hide other layers, then Pose Mode on L7_Rig |
L8_物理 |
Cloth and rigid-body simulation | Play the timeline |
Full step-by-step walkthrough: docs/en/TOUR.md (中文:docs/zh/TOUR.md)
If every layer reports OK, your install works end to end. To check therenderer and exporters too, select L4_Cam and press F12, or runblender_export_fbx on any object.
Running it twice? Pass --clean (as above) so the previous run's objects do notcollide with the new names.
Tool Profiles
| Profile | Tools | Use Case |
|---|---|---|
minimal |
35 | Core scene/object/utility/export only |
skill |
38 | Default — core + on-demand skill loading |
focused |
124 | Curated workflow set |
standard |
186 | Broader daily-use coverage |
extended |
215 | Adds physics & batch operations |
full |
377 | Everything |
Skill System
With the default skill profile, only core tools load at startup. AI activates additional groups on demand:
blender_list_skills         → see all 12 available skill groups
blender_activate_skill      → load a group's tools dynamically
blender_deactivate_skill    → unload to free AI context
Skills include: modeling, materials, style, character, animation, scene_setup, automation, physics, batch_assets, advanced_3d, sport_character, training.
Documentation
All documentation is available in English and 中文 (Chinese).
| Document | English | 中文 |
|---|---|---|
| Quick Start | QUICKSTART | 快速开始 |
| Guided Tour | TOUR | 分层演示教程 |
| Installation | INSTALLATION | 安装指南 |
| Architecture | ARCHITECTURE | 架构设计 |
| API Reference | API_REFERENCE | API 参考 |
| Skill System | MCP_SKILL_SYSTEM_GUIDE | Skill 系统指南 |
| Tutorials | TUTORIALS | 教程 |
| Contributing | CONTRIBUTING | 贡献指南 |
| Changelog | CHANGELOG | 更新日志 |
| Roadmap | ROADMAP | 路线图 |
| Security | SECURITY | 安全策略 |
| Code of Conduct | CODE_OF_CONDUCT | 行为准则 |
Community
- GitHub Discussions — questions, ideas, long-form discussion
- Issues — bug reports and feature requests
- Contributing Guide — how to add tools, fix bugs, improve docs
Contributing
We welcome contributions! Please see CONTRIBUTING.md for guidelines.
- Fork the repo & create a feature branch
- Install dev dependencies:
uv sync --all-extras - Make changes and add tests
- Run checks:
pytest && ruff check src/ && black --check src/ - Submit a pull request
Security
For security concerns, please see SECURITY.md. Do not open a public issue for security vulnerabilities.
Known Caveats
- If
.venvbreaks after copying the repo to another machine, delete.venvand re-runuv sync
License
MIT — Copyright (c) 2026 Harvey Xia
中文
[!IMPORTANT]本项目与其他任何同名 Blender MCP 项目均无关联。这是一套独立、原创的代码库,不是任何项目的 fork,也不共用任何代码。特别地,本项目与
ahujasid/mcp-for-blender(其旧版在 PyPI 上叫blender-mcp)毫无关系。PyPI 上的blender-mcp属于那个项目,安装它不会安装本软件。安装本项目请克隆本仓库,见快速开始。
来源说明: 「MCP 服务器 + Blender 插件、走本地 socket」这个整体形态是本类工具的通用做法,其他 Blender MCP 项目也采用类似结构,因此架构层面看起来会相似。本仓库不是 fork,实现为独立完成。
概述
Blender MCP AI 是一个开源的 Model Context Protocol 服务器,让 AI 助手可以通过自然语言控制 Blender。支持 Cursor、Windsurf、Claude Desktop 等任意 MCP 兼容客户端。
展示
以下渲染完全通过自然语言 AI 命令生成,无需手动操作 Blender。
一个由智能体端到端生成的角色 —— 体型模板、头发、服装、配饰全部由 MCP 工具创建,再经打光与 1920×1080 渲染。它是刻意简化的图元搭建,重点在完整回路,而非精细度。 本项目的价值不在单张渲染的精细度,而在 agent ↔ Blender 管线:380 个工具、动态技能加载以精简上下文、以及让模型自审自迭代的视口/渲染截图。
核心特性
- 380 个 MCP 工具,覆盖建模、材质、动画、渲染等全流程
- 智能工具加载 — 默认
skill配置仅加载 38 个工具,12 个技能组按需激活 - 6 种配置方案 — 从
minimal(35 个工具)到full(377 个工具) - 视觉反馈 — 视口截图 + 渲染预览,支持多模态 AI 审查循环
- 检查点系统 — 高风险操作前的命名存档/还原点
- 风格系统 — 8 种渲染风格预设(像素风到 3A 级)
- 67 种程序化材质 — 金属、木材、石材、布料、自然、皮肤、特效、卡通
- 质量审计 — 拓扑、UV、性能验证
- 兼容 Blender 4.x / 5.x
快速开始
git clone https://github.com/harveyxiacn/blender-mcp-ai.git
cd blender-mcp-ai
uv sync

# 打包 Blender 插件
python build_addon.py

# 启动 MCP 服务器
uv run blender-mcp-ai
目前尚未发布到 PyPI。请从源码安装 ——
pip install blender-mcp装到的是另一个无关的第三方包(见顶部说明)。
然后在 Blender 中:
编辑→偏好设置→插件→安装...- 选择
dist/blender_mcp_addon.zip - 启用 Blender MCP
- 在 3D 视图侧边栏打开 MCP 面板
IDE 配置:
{
  "mcpServers": {
    "blender": {
      "command": "uv",
      "args": ["run", "--directory", "/path/to/blender-mcp-ai", "blender-mcp-ai"]
    }
  }
}
上手试一下(分层演示)
想先看看它到底能做什么?保持 Blender 打开、插件已启用,然后运行:
uv run python scripts/demo_tour.py --clean
脚本会通过 MCP socket 执行 46 次调用,并把结果按图层分到各自的集合里,方便你逐层查看:
| 集合 | 演示内容 | 怎么看 |
|---|---|---|
L1_场景基础 |
物体创建与变换 | 大纲视图选中 L1_Cube,按 N 看变换数值 |
L2_建模 |
Bevel / 细分 / 布尔 修改器 | 右侧扳手图标,逐个开关修改器看差异 |
L3_材质 |
金属 vs 塑料、Principled BSDF 参数 | 按 Z → 材质预览 |
L4_灯光相机 |
三点布光 + 相机 | 按 Z → 渲染预览;选中灯光看功率 |
L5_UV |
Smart UV 展开 | 打开 UV 编辑器,按 Tab 进编辑模式再按 A |
L6_动画 |
关键帧弹跳 + 自转 | 时间轴按 空格 播放 |
L7_角色骨骼 |
程序生成角色 + 骨架 | 隐藏其他图层,对 L7_Rig 进姿势模式 |
L8_物理 |
布料 + 刚体模拟 | 播放时间轴 |
逐层详解请看:docs/zh/TOUR.md(English:docs/en/TOUR.md)
每一层都显示 OK,就说明整套流程跑通了。想连渲染和导出一起验证,选中 L4_Cam 按 F12,或对任意物体调用 blender_export_fbx。
重复运行时请带上 --clean(如上),否则上一轮的对象会和新的重名冲突。
社区
- GitHub Discussions — 提问、讨论、展示作品
- Issues — 问题反馈与功能建议
文档
所有文档均提供 English 和 中文 版本,详见上方文档表格。
系统要求
- Python 3.10+
- Blender 4.0+
- 任意兼容 MCP 的客户端
许可证
MIT — Copyright (c) 2026 Harvey Xia


